Friday, December 30, 2016

December Blog Carnival - The Year in Review

It's blog carnival time at the Jewelry Artisans Community.  With the arrival of December and the end of 2016, we decided to re-visit our 2016 challenge items.  Each month a group of us challenge ourselves to make a piece of jewelry based on a theme we have chosen.  Sit back and enjoy this trip down memory lane!

January - New

Our challenge was to design jewelry using something that was new to us.  It could be a new technique or a new material or something else we weren't familiar with.  I chose to make post earrings using copper wire:


February - Romance

In honor of Valentine's Day we decided to make jewelry that was romantic.  Using crystals and sterling silver chain, I made these dainty, dangling earrings:


March - Lariats

For the month of March, lariat necklaces were our challenge.  Having never made one before, it was definitely a challenge!


April - Spring has Sprung

With spring in the air the obvious choice for our challenge theme was Spring:


May - Button, Button, Who Has the Button?

Fairly self explanatory - we had to use buttons in a jewelry design:


June/July - Zip It Up

We combined June and July because we were all busy with summer activities and made jewelry out of zippers.  This was one of my favorite challenges and a lot of fun to see what everyone designed:


August - Cool Clear Water

Because August is so bloody hot, we chose a theme that made all of us feel cooler.  These earrings made of blue glass beads were my entry:


September - Goodbye Summer

Many of us were glad to see summer and it's hot weather go.  Our challenge was to find our inspiration in this photo of sunflowers:


This was my entry:


We had the best of intentions for October, but the month got away from us and we never got around to making our designs!

November - Fire

With the arrival of November, we also saw the arrival of cooler weather and took our inspiration from the fires that were now burning in wood stoves and fireplaces:


December - Christmas

Before we knew it, December was here and Christmas was looming.  Our challenge was to make Christmas jewelry.  These earrings feature coral beads which have been netted with aqua/teal colored wire:


I hope you have enjoyed this review of 2016.  To read what other members of the Jewelry Artisans Community have to say about their 2016 jewelry challenges, please click on the links below:

Violetmoon's Corner

Cat's Wire


Monday, November 28, 2016

November 2016 Blog Carnival - You Know You Are a Jewelry Artist When...

We used to play this game on our old jewelry site and some of the stories were hilarious.  Things like seeing the word "swarovski" (as in famous crystal maker) when reading a story about former French president Nicolas Sarkozy.   Or, recording every trip to a bead store in photos so that you can post pictures of all of the beads you looked at for your jewelry making friends.  Yes, it's blog carnival time at the Jewelry Artisans Community and being a jewelry artist is what we're talkin' about!

Back when our jewelry making group was playing this game, I told a true story about the time I was thinking about a new design I was working on while changing the sheets on the bed.  I stripped the bed, got fresh linens out of the closet and proceeded to make the bed.  Just as I was finishing and fluffing up the pillows, I noticed the stack of clean sheets sitting on the dresser.  Yep, I was so involved in thinking about the jewelry design that I forgot to put the sheets on the bed which just goes to show how involved we jewelry makers get when working on a new project.

Now you will understand when I tell you how obsessively involved I have become in my latest project - preserving fall leaves in resin.  I patiently waited for fall to arrive so that the leaves would begin to turn color.  Once they did, I spent hours walking among the trees gathering up leaves with vivid colors and/or patterns.  I collected bags of leaves - even I was beginning to think it was a little bit out of control!  Once home, it was time to sort them out for drying:


After they were dry, several coats of resin were applied to preserve the leaves and those fabulous fall colors.  Let me tell you that applying resin to leaves without using a mold is not for the faint of heart!  I'd heard stories about out of control resin and this time experienced it for myself.  Resin is sticky stuff and it thickens as time passes.  I had resin stuck to my fingers, leaves stuck to the resin on my fingers, leaves stuck to the table and a couple of resin spills.  My favorite was dropping a leaf in the cup of resin which ended up being a sticky, runny, drippy mess!   But, I am stubborn and was determined to stick (no pun intended) it out.

This is one of my early attempts.  While the resin wanted to stick to me and everything else it could find, it did not want to stick to the left side of the leaf which is why there is discoloration on that part of the leaf.  But, I learned a lot about what worked, what didn't and what to do differently next time.  While not good enough to sell, I'm proud of this leaf and it will become part of my personal collection:


With this now under my belt, it was off to collect more leaves and repeat the process.  Armed with what I had learned so far, this time things went better despite a few setbacks:


Next was a pendant made from a brown leaf that I found mixed among all the bright yellow, orange and red leaves.  It wasn't the most colorful or show stopping of all the leaves, but it had a beautiful rich pattern of browns and rust that draw me in.  I'm very glad I stopped to pick it up that day:


Leaves have been on my mind constantly.  I fall asleep thinking about them and when I wake up in the morning, the first thing I want to do is head to the studio to experiment with leaves.   I'll soon be finishing up the autumn leaf project and it will be time to move on to the next thing that grabs my attention.  I actually already have some ideas whirling around in my head.  Will I be as involved and as obsessed as I was with the leaves?  You bet; because you know you are a jewelry artist when...

To see what other jewelry artists at the Jewelry Artisans Community have to say about this month's topic, please click on the links below:

Violetmoon's Corner

Cat's Wire


Friday, November 25, 2016

Silver Dollars

A friend of mine recently brought a few branches of Lunaria plant from her yard to my house at my request.  I've recently developed an interest in using natural materials in my jewelry designs and had seen the lovely, silvery, tissue paper thin seed pods of this plant during our last get together at her home.

 
Because the seed pods are about the size of an American silver dollar and due to their color they are often called silver dollars.  The Lunaria plant is also known as the "money plant".  Easy to start and not at all fussy this is a good plant for gardeners who want a plant in their garden that doesn't require a lot of fussing.  It blooms in the summer and the flowers are the source of the seed pods that come later.  It is also supposed to be deer resistant.  These qualities have me planning on starting seeds in my flower beds this spring.

The seed pods are hidden inside non-descript brown husks that most people wouldn't give a second look.  But, rubbing the husks between the fingers reveals the beautiful treasure within.


The pods are usually used in floral arrangements and make a striking contribution with their translucency and ability to capture light.  My plan was to give them several coats of resin and turn them into jewelry.

What started out as an experiment, turned out to have a very successful result:


To say that I'm pleased with how this project worked out would be an understatement.  I have plans to pursue another idea using these seed pods, but that is a topic for another day!


Wednesday, September 28, 2016

September 2016 Blog Carnival - Tools or Something Like That

Here it is September already and time for another blog carnival from the members of the Jewelry Artisans Community . Our topic this month is tools.

I will be the first to admit that it wasn't that long ago that my knowledge of tools was very limited.  Sure, I could use a screwdriver or pound with a hammer, but that was about it.  Tools were something manly men used to build houses and work on cars, certainly not something I had any use for as I went about my days.

Then jewelry making entered my life.  I started out with a basic set of tools, needle nosed pliers, round nose pliers and cutters.  It wasn't long and I was feeling pretty comfortable with my tools.  Of course, with practice and knowledge came boredom.  I wanted to branch out and try other types of jewelry design besides stringing beads.

But, tools are expensive and I really didn't know what I needed.  So, the first thing I did was raid hubby's toolbox.  I found a rubber mallet, a tool that punches various size holes in metal, tin snips for cutting copper sheet and a piece of thick, slightly rusty steel to use for pounding on metal with a hammer.  I was in hog heaven!

One of the things I wanted to try with my copper sheet was shaping round pieces into a slight bowl shape.  To do that, I needed a dapping block which is a block of metal or wood that has bowl shaped indentations.  Round shapes cut from metal sheet are placed on one of the indentations and hammered until it takes on a bowl shape.


Looking around the house to see how I could improvise, I came across a melon baller that had never been used.  It worked perfectly until it took so much pounding that it lost it's round shape.  It is no longer suitable for pounding copper sheet into bowl shapes or making melon balls!


My first "real" tool purchase was something I'd been coveting for a long time and it was a Dremel.  But, they were expensive for someone who was trying to only fund her jewelry hobby with proceeds from sales of jewelry and not dip into household funds.  One winter day, I noticed they were on super sale at my local hardware store - they were practically giving them away.  The next morning I got up planning to head over to the store and pick one up only to find that I was snowed in.  There would be no trips to town on this day.  I was so bummed out.  Thank goodness for my brilliant idea to call the hardware store and ask if I could purchase one over the phone.  "Yes!" they said!  That was one happy day.


The Dremel opened up new worlds of creativity.  I could now drill holes, cut metal, buff and polish, sand and a gazillion other things that weren't possible previously.  I love my Dremel!

Next up, I decided I just had to have a tumbler - another expensive purchase.  In cases like this, when I'm not sure how much I will really use something and when cost is a consideration, I turn to Harbor Freight.  They have relatively cheap tools and all sorts of unexpected products.  It's fun just to spend a day browsing in one of their stores.  Despite warnings that the quality of a tumbler from them might be suspect, I went ahead and purchased a tumbler and it has worked like a champ.  I use it all the time to clean dirty metal and harden components such as ear wires and hand made chain.


Just recently, I decided that I was really tired of pounding metal on that rusty piece of steel mentioned earlier.  Back to Harbor Freight for an anvil which I find myself using more and more.


While I was there and looking around, I also decided to buy a mini-dremel type tool.  Sometimes the Dremel is bigger than what I need for the job and this mini will also fit my hand better.


And, I found this cool third hand too!  It's not something I really had to have, but it was only $4.00 so I figured I might as well.  Just yesterday I used to for the first time to hold a ring for a resin pouring project.  I needed the ring to remain level overnight and it worked perfectly!


There are a few other tools on my list that I would like to have, so I am currently looking around doing some pricing and seeing what's available.  Who would have ever thought that this mechanically challenged, tool ignorant girl would become a tool junkie!?

To see what other members of the Jewelry Artisans Community have to say about tools, please click on the links below.

Cat's Wire

Violetmoon's Corner

Tuesday, August 30, 2016

August 2016 Blog Carnival - Bead Store Experiences

It's the end of August and that means it's blog carnival time for the Jewelry Artisans Community.  Our topic for this month is to tell about bead store experiences we've had or to share bead store stories.  Let me start out by saying that I love small, local bead stores!  They can be a source for beads and components that you just won't find anywhere else.

When I first started making jewelry, I shopped at the big online bead stores for my supplies.  They had tons of selections, the prices were reasonable (well, as reasonable as it gets for beads) and it was convenient.  It didn't take long for me to realize that many other jewelry designers shopped at these places as well.  I started seeing other online jewelry sellers using the same beads and components that were part of my stash.  In my quest to produce unique and different jewelry, I didn't really like that very much.

Fortunately, my small town has a local bead store and the woman who owns it is a person who has spent years collecting beads and components from all over the world as well as vintage items.  She has a very eclectic mix of merchandise in her shop and I became a frequent customer.

Not long after this, we decided to go on vacation.  Until then, it had never occurred to me to visit bead stores out of my area and this was the perfect opportunity to do just that.  It has now become a given that anytime we are out of town, I will seek out the local bead stores to see what they have in stock.  I have purchased beads from stores in Lake Tahoe, Truckee, towns along the northern California coast, Vermont, Nevada and even Thailand (which was one of the biggest thrills of my life!).

Here are some of my recent finds:

From Talisman Beads in Eureka, California, I picked up these glass beads plus the two textile beads the left.  They were mostly things I hadn't seen before which guaranteed they'd go into my shopping bag!


These earrings were made from part of that haul and I wished I had bought more of these blue beads.  As it turned out, two weeks later I found myself back in Eureka and over to Talisman I went only to find that they had just one pair left.  I quickly scooped them up.  This is a good lesson to learn - when you find something you love, don't put off purchasing as chances are whatever it is will be gone when one does go back to buy.


These cute little owl beads are also from Talisman's.  I bought them in gray, white and black.


Next door to Talisman is a fairly new store called Philosophers Stone Gallery that is filled with rough stones, polished stones, cabochons, beads, fossils and all kinds of other unusual items.  It was my first visit, but certainly will not be my last!


During this trip, I also visited Chapmans Gem and Mineral Shop in Fortuna, CA.  Housed in a large warehouse, they have piles of raw rock in outside bins.  From these rough hunks of stone, they cut and polish their own beads and cabochons.  Chapman's also has a large museum where every possible type of stone and fossil you can imagine is on display under glass cases.  I could spend an entire day just looking at all of the rocks!  In another wing, there is a gallery of really special things that is open by appointment only.  If you're into rocks, stones, fossils and beads this is a really interesting place to visit.


Raw Copper Nuggets Shown on Right

Next up was Heart Bead in Arcata, CA, where I found these cute fruit beads as well as the cool skull beads.   Hey, Halloween is right around the corner - time for some spooky jewelry!


Last fall, my friends, sister and I decided to visit Vermont to see the fall colors.  While there, we stumbled across a wonderful bead shop (the name of which I don't recall) and I spent several hours shopping while the rest of my group went off to do something else.  They were actually very patient with me and my bead obsession.  The very awesome skull bead in this Dia de los Meurtes or Day of the Dead necklace  came from that shop.  The lampwork beads with the flowers are from a small shop in Truckee, CA and the silver beads are from a Hill Tribes Silver store in Chiang Mai, Thailand.


This wire netted stone is also from the bead shop in Vermont:


Speaking of Thailand, we spent three months visiting Asia last winter and one of the highlights of the trip was spending a few days in Chiang Mai, which is in northern Thailand.

One of the best parts of our stay in Chiang Mai was discovering that there was a Hill Tribes silver store right next door to our hotel.  I spent a very happy afternoon in there looking at bin after bin of silver beads, charms and components.


There are literally hundreds of bins and each one contains a different bead/component design.  I went over budget, but decided it was a once in a lifetime opportunity and handed over my Thai bahts.


While in Chiang Mai, we spent one day at the Elephant Nature Park which is a rescue operation for abused, neglected and injured elephants.  It was such a wonderful day, meeting the elephants, learning each one's story and being allowed to feed, bathe and visit with them.


In honor of the elephants, these earrings were the first thing I made with my stash of Hill Tribes silver.


Another one of my favorite places for finding unusual beads and jewelry parts is a local shop that sells vintage jewelry which has been purchased from estate sales, auctions and Ebay.  I could spend hours rummaging through the bins of broken jewelry.  Actually, I have spent hours doing just that!

I then use these components as canvases and frames for my miniature paintings.  When finished they are turned into pendants and incorporated into jewelry designs.


Thrift stores can also be a source of unusual beads.   I always look through the jewelry displays and have often found jewelry to take apart in order to salvage the beads, clasps and other parts for new designs.  When incorporating used or vintage supplies for creating new jewelry, it is important to remember that these items are often coated with years of grime, so I am sure to give them a good cleaning before using.

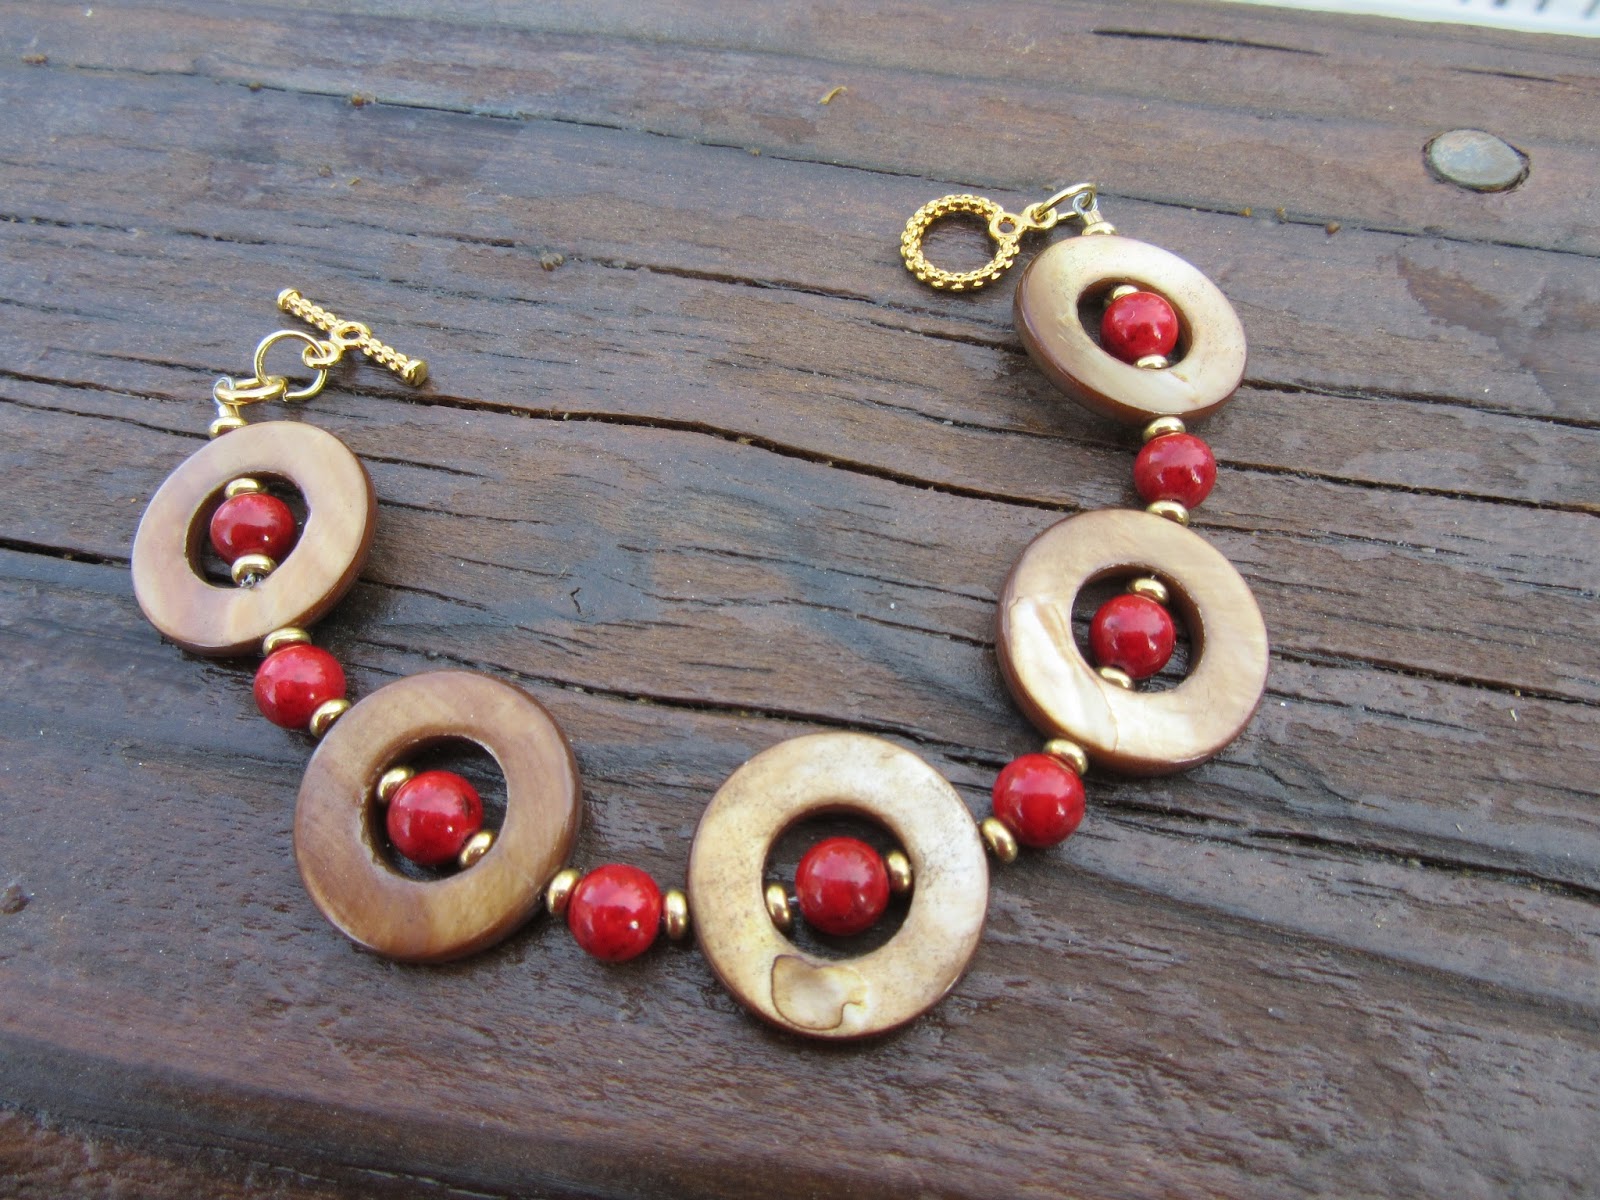
Since discovering small bead stores while traveling as well as museums, rock shops and thrift stores, my outlook regarding supplies has completely changed.  The hunt for treasure in the form of beads  and parts is a large part of it, but so are the people who own and work in these places.  They are friendly, love to talk beads and will ask what I am working on as well as sharing their latest work.   The merits of various techniques are discussed at length.  Beading history and sources of supplies generate endless conversation.  Every time I leave one of these small shops, I walk out feeling that I have met a kindred spirit.  No longer will I buy from the big suppliers - these small operations have won my heart!

To read what other members of the Jewelry Artisan Community have to say about bead stores, please click on the links below.

Cat's Wire

Violetmoon's Corner